Gel nails allow you to achieve a very elegant effect that will last for a long time. Sooner or later you will get tired of them and it will be time to remove them. Although it is best to go to a nail salon, there are formulas to do it on your own. If you are wondering how to remove gel nails at home , here we will teach you.

You will only have to prepare a series of materials, follow the steps that we indicate and have some patience. Keep reading to know the whole process:
Materials to remove gel nails at home with acetone
Gel nails are so strong because they have a special glue . This is the reason that not only will you have to try to remove the enamel, but you cannot take it off as is because it could be damaged. Fortunately, there are effective methods to remove gel nails , such as the one we propose in this article.
First of all, you need to prepare the following materials:
- Acetone
- cotton discs
- Vaseline
- Special cuticle pusher
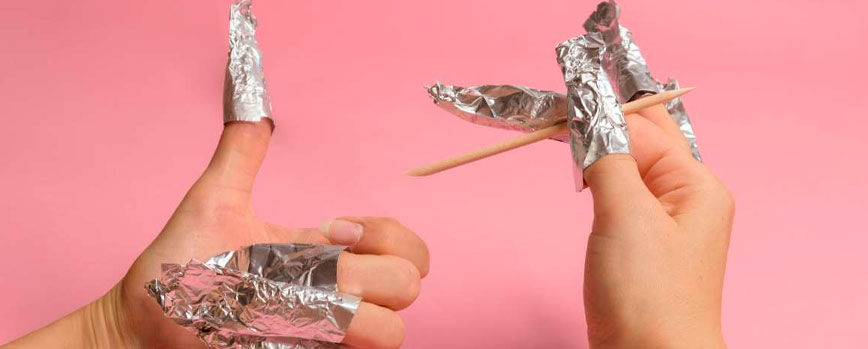
- Foil
- Special product to hydrate nails and cuticles.
By using acetone to remove gel nails you will achieve your goal, but it requires patience . In about 40 minutes you can get it . source
5 Easy Ways to Remove Gel Nails
1. Protect your fingers with Vaseline
You are going to use Vaseline to protect your fingers while Remove Gel Nails, since subjecting them to acetone for so long can be harmful, causing some small irritations.
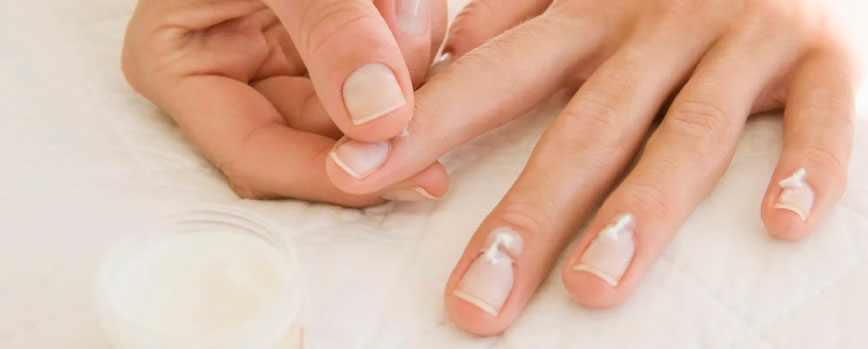
The first step in this tutorial on how to remove gel nails is to apply Vaseline below the junction of the nail with the flesh . You must do it carefully to avoid not covering the nail area ; if you do, the acetone won’t work.
Read also: Remove Shellac Manicure With 5 Easy Steps
2. Apply the Acetone
Although you can use cotton and make a ball, it is better to use discs to better control the amount of acetone to apply. Soak an appropriate amount and place on the nail, allowing it to sit for about 15 minutes .
This duration is indicative and will depend on the resistance of the nails (depending on the adhesive, the time it will take for it to take off may be longer or shorter).
Once that time has passed, move on to the next step. If they are still too hard, replace the cotton. It is also possible to remove gel nails with alcohol , although acetone is much more effective and less aggressive with the skin.
3. Drag the Polish Gel from nails
Now you are going to see how to remove gel nails using the cuticle pusher .
You should observe that the gel begins to come off on its own, since it will be an indication that the acetone is having its effect. Otherwise, attempting to remove it would be a mistake and could cause major damage.
Drag the cuticle pusher along the nail to remove the polish . It is important that it come out on its own, without using more force than necessary and you should not scrape.
This is the most laborious step, so you must be patient and in about 40 minutes you should be done . If it is the first time you do it, it may take a little longer.
4. Final Hydration
No matter how careful you have been, the cuticles and nails will have suffered during this process. So it’s time to hydrate them.
To do this, use a special product to hydrate nails and cuticles . A few drops should be more than enough to achieve that hydration; however, do not hesitate to use it with the corresponding frequency to avoid damage in that area.
This is the process of how to remove gel nails at home using acetone.
Few Methods to Remove Gel Polish at Home
Hey there, lovely viewers! Welcome back to my blog. It’s your girl Heena here, and today I’ve got something super useful to share with you all. We’re diving into the world of DIY nail care because I’m going to show you five fantastic ways to remove that stubborn gel polish right at home. So, without any more chatter, let’s jump right into it. Just remember, gorgeous nails await you at the end of these methods!
- Prepping for Success
Before we get into the nitty-gritty of removal, there’s a crucial step you need to follow across all these methods. Strip off the top layer! Whether it’s a matte finish or glossy, you need that top coat gone. Why? Because it lets the acetone do its thing. Now, there are a few options for this – grab a nail file, use a buffing block with some texture, or opt for an e-file. Personally, I prefer the 180 grit nail file for this step, but feel free to choose what works best for you. Just remember, the thinner the gel, the quicker the process, but if filing isn’t your thing, no worries – just let it soak a bit longer.
- The Magic of Pure Acetone
For all the methods, you’ll need the star of the show: pure acetone. This isn’t the time for regular nail polish remover; it’s gotta be the real deal. I usually go for the Sally Beauty or Target’s 100% acetone. Trust me; anything less just won’t cut it! - Soak Off Remover Clips
First up, we have soak-off remover clips. These little gadgets come in handy, but they do have their quirks. Grab a cotton pad or ball soaked in acetone, place it on your nail, and then clip the remover on top. Easy, right? Just keep an eye on it – the acetone can dry up quickly, so you might need to replace the pad a couple of times. But it gets the job done! - Foil and Cotton Ball Method
Next is the classic go-to method that probably all of us have tried at least once. You’ll need aluminum foil and a cotton ball. Tear the cotton ball in half, saturate it with acetone, wrap it around your nail, and secure it all with the foil. It’s efficient, but a bit messy – acetone might dribble, and the foils can pop off. But don’t worry, they work wonders once you have them on! - Pre-Attached Cotton Pad Foils
Here’s a time-saver: pre-attached cotton pad foils. These foil sheets come with the cotton pad already fixed, and they’re thicker than regular foil. I stumbled upon these on Amazon from McCart, and they’ve quickly become my favorites. They’re a breeze to use, and that thicker foil really seals the deal! - The Hot Water Bag Method
Got a sandwich bag lying around? Perfect! Place a paper towel soaked in acetone at the bottom, pop your hand in, and seal the bag. Now, immerse the bag in a bowl of warm water (not scalding!) and get to work. The heat, acetone, and rubbing against the paper towel create a triple-threat combo for quick removal. - Soak-Off Bowl Method
Investing in a soak-off bowl could be a great idea. Place a cotton ball at the bottom, pour in acetone, and dip your fingers. With this method, you can even monitor the process as you go, filing or scraping off the softened gel. - Finishing Touches
Once you’ve successfully removed the gel, grab a cotton ball soaked in acetone and wipe your nails. A gentle buffing with a buffing block can even things out. Remember, don’t over-buff! Finish off by washing your hands and applying cuticle oil for a pampered finish. - Wrapping Up
Removing gel polish at home can take anywhere from 10 minutes to 45 minutes, depending on factors like the method used, the thickness of the gel, and your initial filing. Experiment with different methods to find your sweet spot.
I hope these techniques make your gel polish removal process a breeze. Thanks for tuning in, and I’ll catch you in the next video. Until then, take care and rock those nails with confidence! Bye for now! 🌟
How to treat natural nails after removing gel nails?

You are probably wondering how the nails look after removing the gel ones . The truth is that, although these nails make our hands look more beautiful, they also deteriorate our natural ones: they become soft and chip quite easily.
Therefore, you will need to follow a routine after removing gel nails, to care for natural nails . Here are some tips you should follow:
- Sanitize the nail: being so delicate after removing the gel, you should cut and file flush with the finger , in such a way that you can prevent it from breaking. With this, the nail is sanitized and it is achieved that it grows correctly.
- Hydration: although you have already hydrated them in the last step of the tutorial on how to remove permanent gel nails, it is recommended to follow a hydration routine . A very common mistake is to use soaps and creams that are not suitable, since all they will do is weaken the nail and cuticles. Apply Vaseline and special oil to end the splinters and make it stronger , with its characteristic effect.
- Apply a hardening product: Hardening products create a protective shield by sealing the nail surface. It will make them stronger and more resistant. Be sure to use an option with a quality formula.
- Allow some time before applying any polish: Most polishes weaken the keratin in your nails, so it’s best to allow some time before reapplying. When you notice that they are strong again, it will be time to do it.
Follow the steps in this tutorial on how to remove gel nails and you will see how you achieve your goal. Be sure to take care of them after the process so that they are resistant and radiant again using the appropriate products.
What materials do I need to remove gel nails at home?
You will need acetone, cotton pads, Vaseline, cuticle pusher, aluminum foil, and a nail and cuticle moisturizer.
Why is it important to use petroleum jelly before applying acetone?
The Vaseline protects your fingers from possible irritation caused by the acetone during the removal process.
What should I do after removing the gel nails to take care of my natural nails?
After removing gel nails, it’s important to follow a care routine that includes sanitation, moisturizing, and the use of hardening products.
Can I apply polish after removing gel nails?
It is recommended to wait some time before applying polish again, as most polishes can weaken the nails. Make sure your nails are strong before using polish.
How to Remove Gel Nails At Home
-
1010

